Setup: Onboarding list and getting started
How the onboarding list guides your setup, which steps it shows, and the order in which you move from another system.
Updated on November 9, 2026
A new account starts with a short welcome wizard: name and mobile phone number (confirmation via SMS code), how you found Xentra, how you manage today (a PMS like Smoobu, Airbnb and Booking.com directly, another system, or no booking system yet, such as Excel, paper, or calendar), how many properties you have, and what you want to improve. This creates your personal setup plan. If you use a system that Xentra does not connect to directly, you can book your free setup call right there (20 minutes, video call): select day and time, Confirm call, the invitation arrives by email. You can also skip the appointment and book later via Book a call in the Getting Started card. After that, a checklist guides you through the setup:
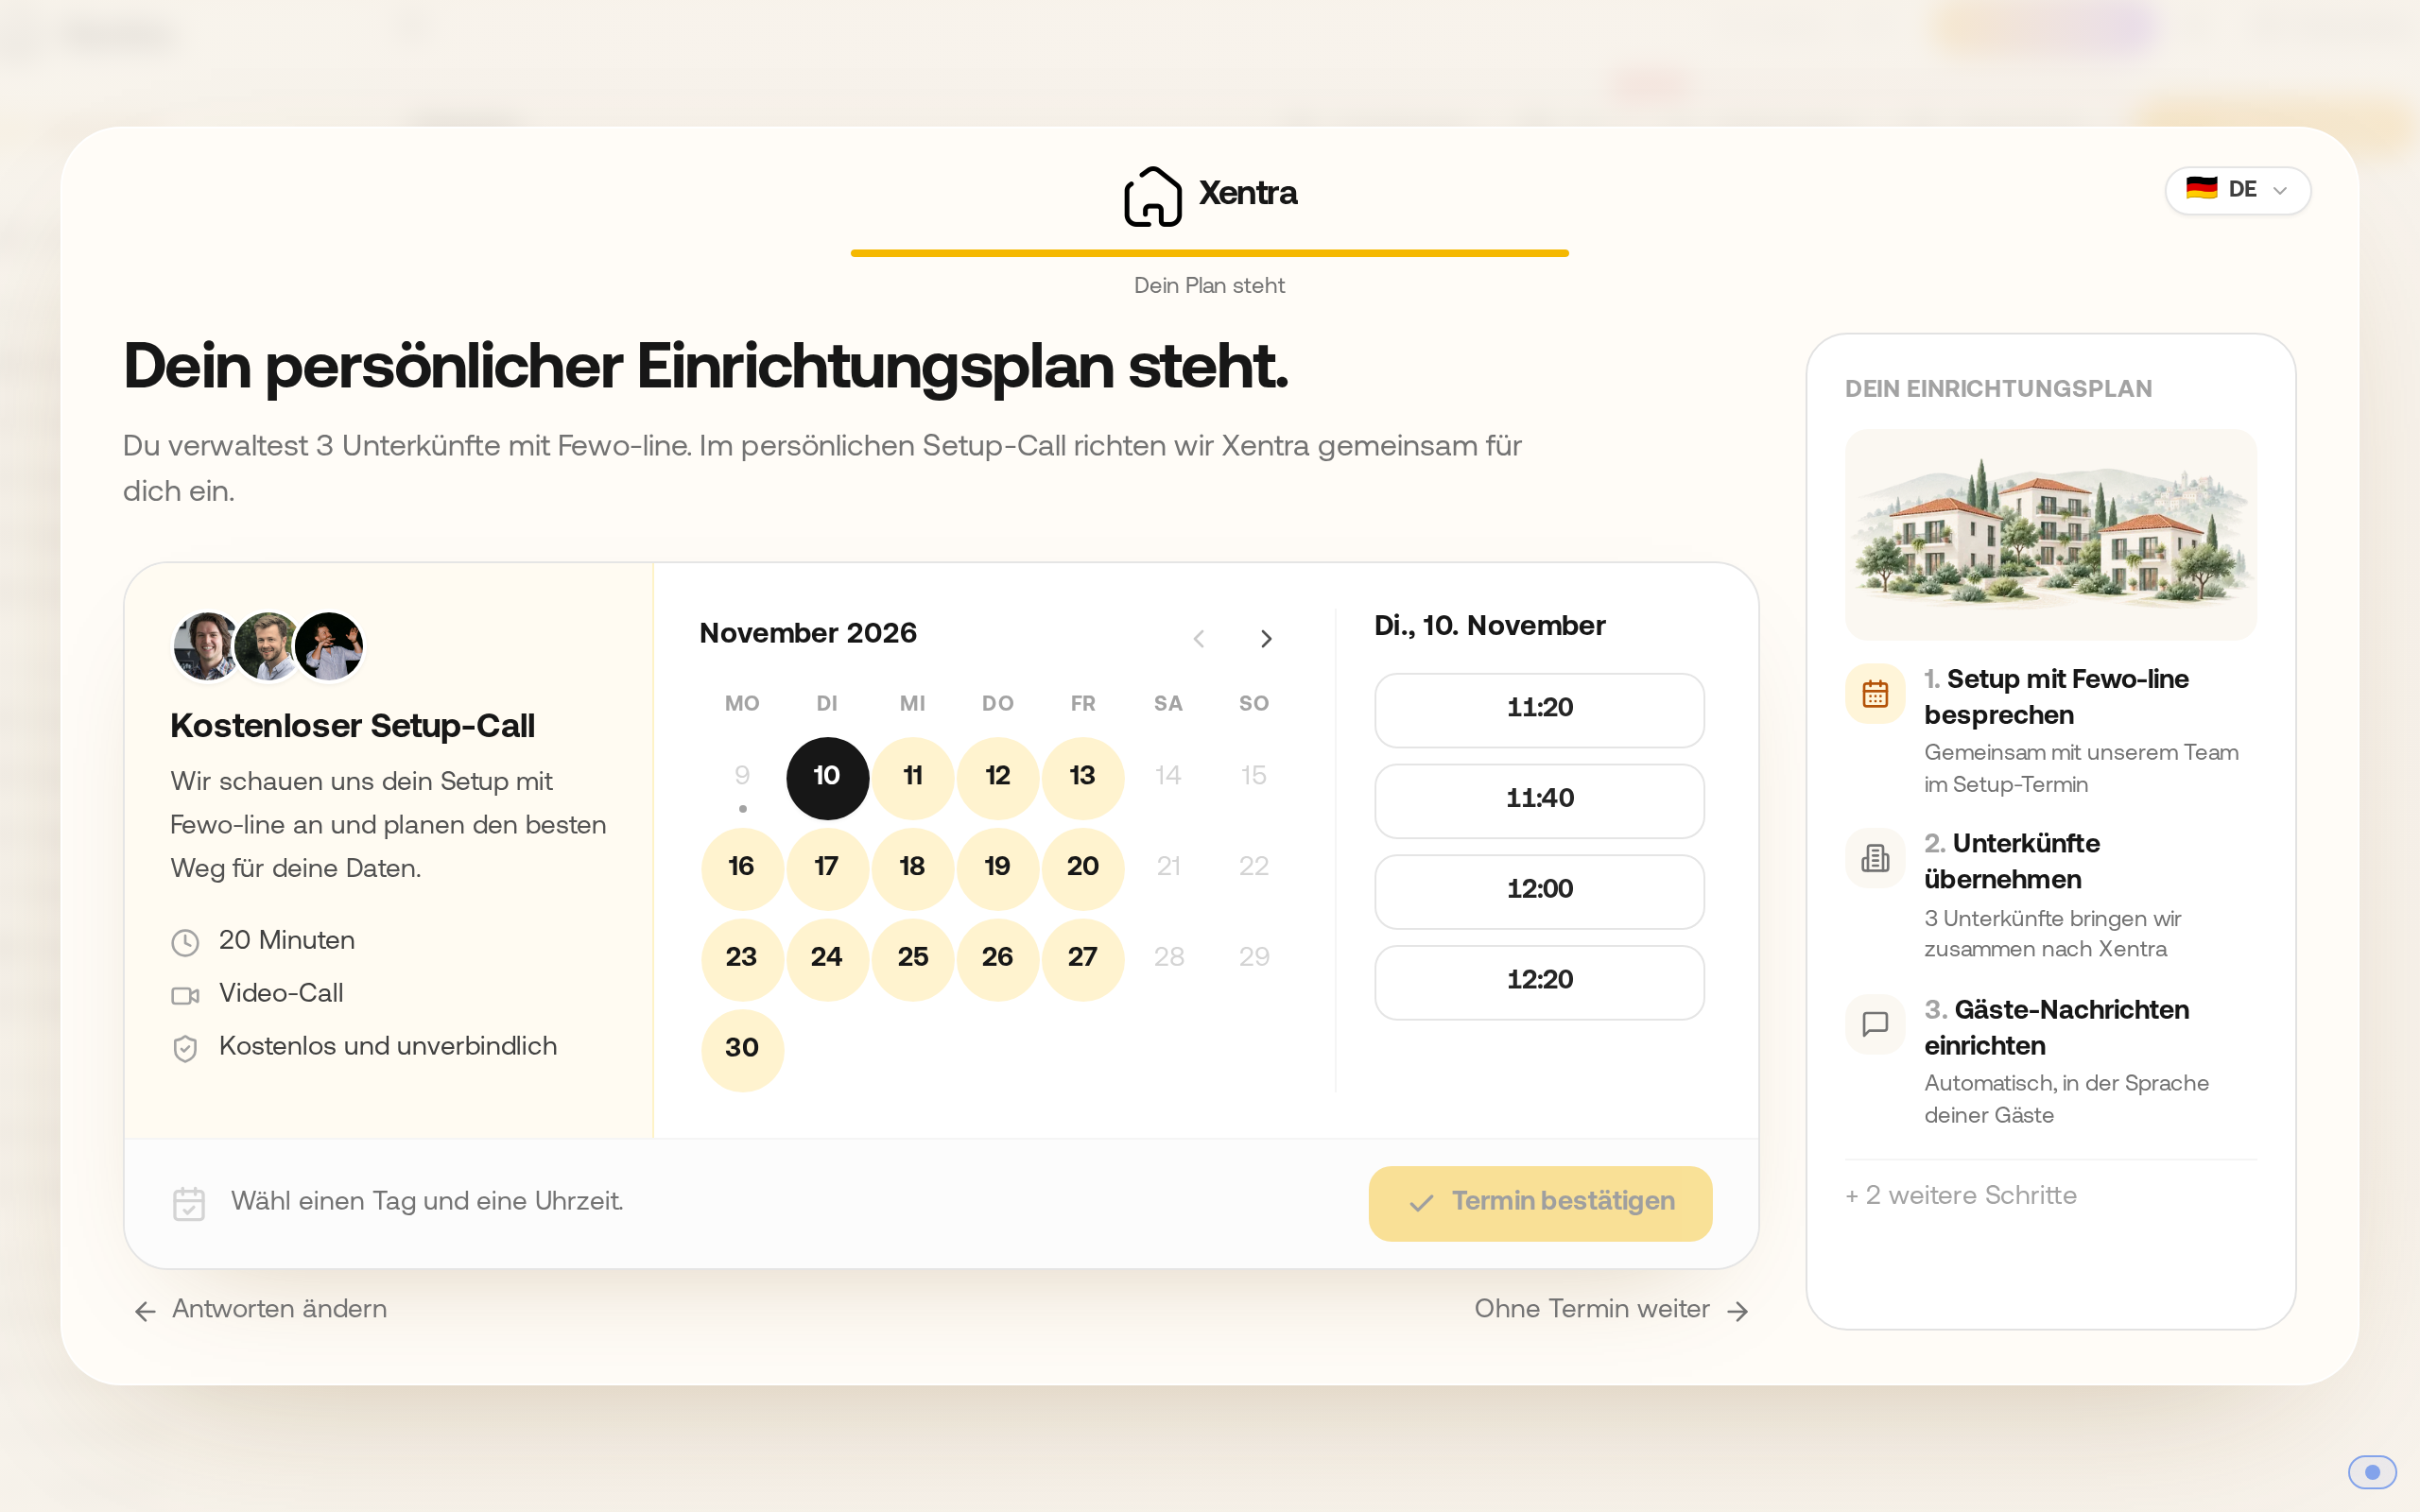 The setup plan with the setup call: select day and time and confirm the call.
- On the dashboard, the Getting Started card shows the next open steps and your progress as a ring (for example "25 %, 4/16"), plus hints for the AI assistant and search (Cmd/Ctrl + K).
- At the top right, the Onboarding button (with the number of open steps) opens the full list in a sidebar: Progress, followed by all pending steps, each with Go to page and Done.
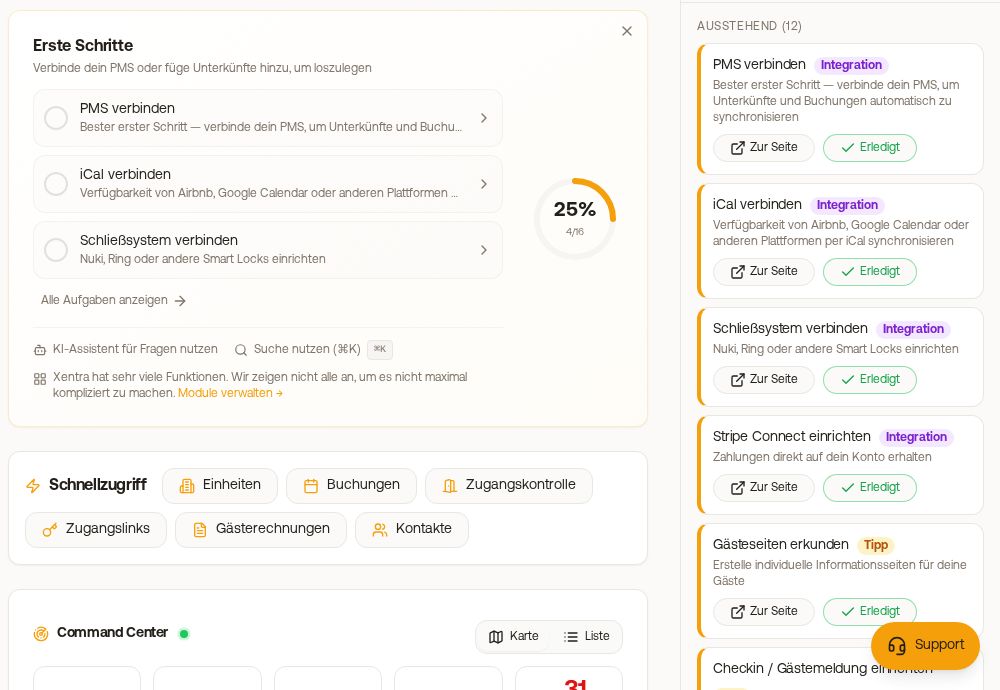 “Getting Started” card and the onboarding list with progress
How the list works
- Xentra automatically marks most steps as completed, for example Connect PMS, Create properties, Complete profile, Import first booking, or Set up Stripe Connect. Steps with the Tip label, such as exploring guest pages or Create message templates, you check off yourself with Done.
- The list adapts: Connect iCal disappears as soon as a PMS is connected. Steps like Configure pricing, Set up tourist tax, Set up insurance, or Set up deposit only appear when the corresponding module is enabled.
- Set up subscription and Add billing details only appear after the first few days of the trial period; with a Pro subscription, the subscription step is removed.
- Go to page leads directly to the right place in the app. You can hide the Getting Started card via the X; the list remains accessible via the Onboarding button.
- The list is available on desktop, not on mobile devices and not in the Xentra app. Team members do not see it.
If you get stuck, book a free setup call (20 minutes) via Book a call in the Getting Started card, see "Support & Contact".
Moving from another system: recommended order
If you are switching completely from Smoobu, Hostaway, or another PMS to Xentra, it is best to proceed in this order. Each step works on its own, and your old system can continue running in parallel.
- Check units and prices. The units are brought along via the import. Set the daily or seasonal prices afterwards: A unit without its own price is sold in the booking tool at the stored fallback price, without warning.
- Switch direct bookings to Xentra. You can find the booking tool under Website & Booking Tool. A new booking tool starts disabled and without selected units; you must set both, otherwise the embedded page only shows an error message to your visitors. Then copy the snippet in the Embed Code/URL tab; there is also a ready-to-use direct link if your website is not ready yet.
- Connect channels directly. Only when direct bookings are working, switch the channels from your old system over to Xentra, one portal at a time.
- Guest communication last. Transfer automations and templates once bookings are already arriving in Xentra.
Which areas you actually need, you configure under Modules; disabled modules also disappear from the onboarding list.