Online check-in: overview and setup
What online check-in is, where you set it up, what the guest fills out, how they pay, and which template they get.
Updated on November 12, 2026
Online check-in: how it works
With online check-in, your guests fill out a form on their smartphone before arrival: personal details of all travelers, arrival time, house rules, signature, and, if you want, tourist tax, deposit, and extra services. The details go directly to the booking, and depending on your settings, Xentra then automatically registers the guests with your municipality or authority.
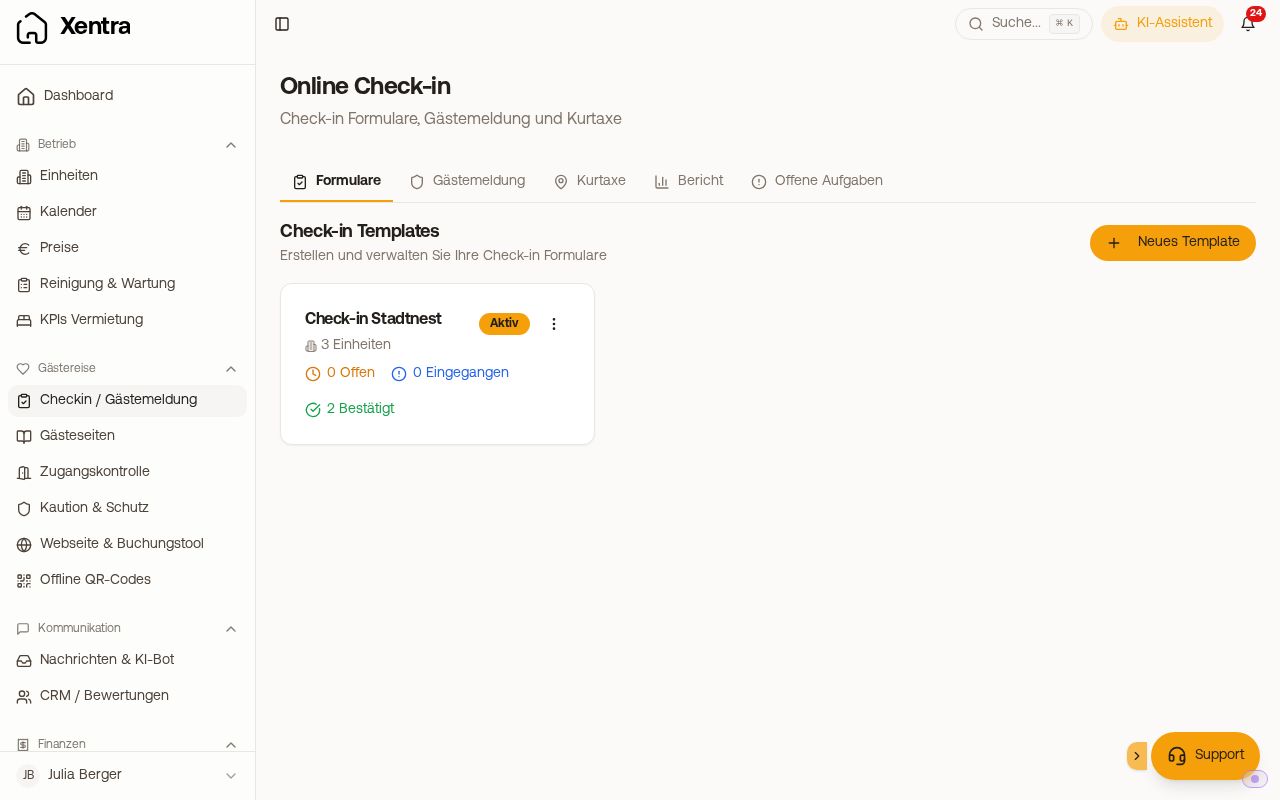 The Online Check-in page with the tabs Forms, Guest registration, Tourist tax, and Report
Where you find it
In the menu under Guest Journey → Checkin / Guest Registration. The page is called Online Check-in and has these tabs:
- Forms: your check-in templates
- Guest registration: direct connection to AVS, Feratel, Tramino, or WinTOP, for countries without a direct connection (for example Italy, Spain) via Chekin
- Tourist tax: rates, age groups, and exemptions
- Report: completion rate, payments, and registration status
- Guest statistics: only if at least one property is in Austria
- Open tasks: only if you use AVS, a mandatory tourist tax, Chekin, or a deposit
Setup in five steps
- Tab Forms, New Template, assign a name, and select the units.
- Go through the tabs at the top of the editor: Home (name, units, welcome message), Guest data (which details you need from whom, plus your own questions for the guest), ID & rules (signature, ID, house rules, privacy policy), Payment & extras, Finish (redirection after check-in), Languages, and Appearance. Then click Save in the bar at the bottom.
- Use Preview at the top right to view the form as your guests see it. The Guest flow card shows for each unit which steps the guest goes through, and warns if no active automation sends the check-in link.
- Insert the placeholder
{{online_checkin_link}}into a message template. - Create an automation that sends this template before arrival.
Details on all settings: see Set up check-in form: guest data, fields, and redirection.
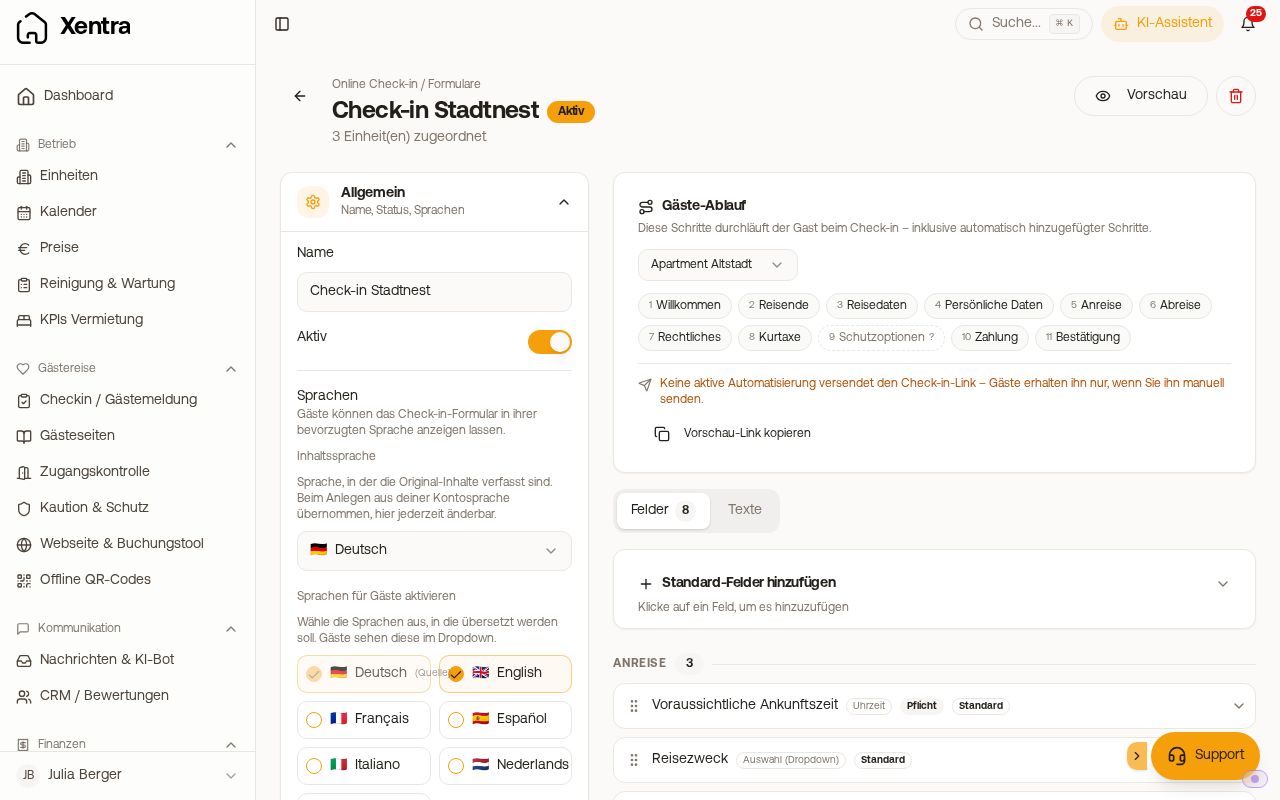 The template editor with the sections on the left and fields on the right
What the guest fills out
The guest starts with a welcome page and then goes step by step through: number of travelers, details per person, your own questions about arrival and departure, house rules, and privacy policy with signature. Depending on your settings, this is followed by ID verification, guest registration, tourist tax, deposit or protection, extra services, billing address (for companies with VAT ID and a dedicated billing email, see Create invoices automatically and send them to the guest), and payment. Saved entries remain saved; the guest can continue later via the same link.
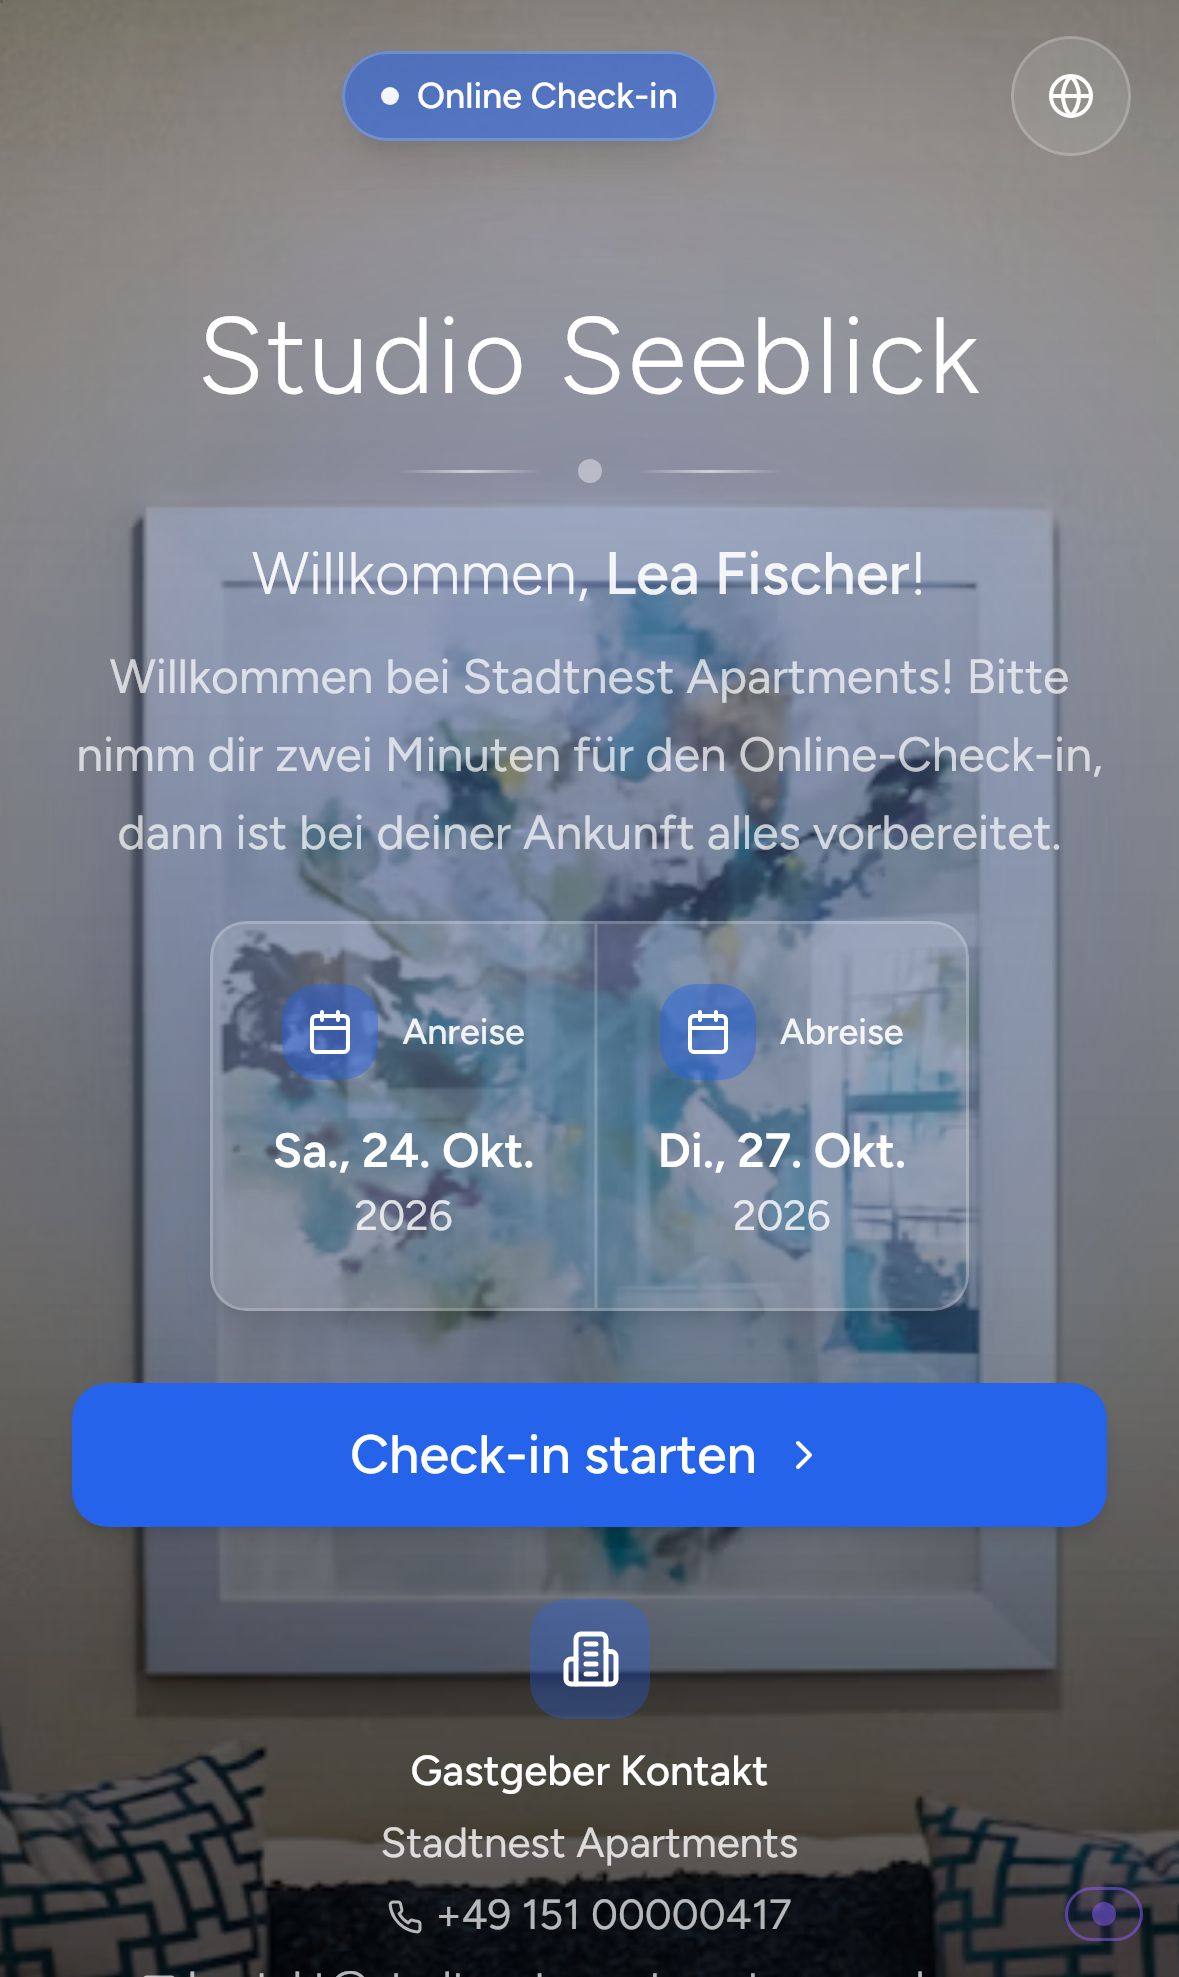 Check-in on the guest's mobile phone
Once the guest has submitted, the check-in is complete. If they open the link again, they only see the confirmation or are redirected to their guest guide, if you set it up that way.
Payment in check-in
In the Payment & extras tab, you define how the guest pays:
- Allow online payment: card payment via Stripe. For this, you need a fully set up Stripe account under Profile & Settings → Payments.
- Allow payment by invoice: the guest can pay by invoice instead of card. This is not possible for deposits and damage protection; these always run online.
You configure deposit, insurance, and damage waiver under Deposits & Protection (see article Deposits & Protection), and the tourist tax in the Tourist tax tab.
Offering extra services
You create products under Profile & Settings → Products. In the template, you select them under Payment & extras → Products & Upselling and configure for each product:
- Recommended (pre-selected): is already in the shopping cart; the guest must actively deselect it.
- Approval required: the guest requests it, you decide. You can see the request in the booking in the Online Check-in tab and confirm it there with Approve or Decline.
- Offered in units: offer the product only for individual units.
More on this in Products & Upselling and, for services on request, in Extra service on request: approve, decline, payment link.
Notifications
You configure notifications for new check-ins, payments, ID verification, or extra services under Profile & Settings → Notifications.
Which template does the guest get?
A unit always belongs to exactly one template. Xentra selects in this order; disabled templates never count:
- the active template to which the unit is assigned,
- otherwise an active template without assigned units (your default),
- otherwise your oldest active template.
If the guest has already started, they stay with their template even if you reassign the unit afterwards. If level 3 applies, the booking in the Online Check-in tab shows the message "This unit is not assigned to any check-in template." If you want to assign a unit to a new template, remove it from the old one first.
Copying, deactivating, or deleting a template
Via the three dots on the template, you can Duplicate it (the copy is initially inactive) or Deactivate it. Guests no longer get deactivated templates; they are listed below under Disabled check-in templates and can be Re-enabled there. Deleting is only possible for a template that no guest has ever checked in with; all check-in data is retained in any case.
Regular guests
For known contacts, Xentra pre-fills the main guest's name, address, date of birth, nationality, and phone number. The guest only uploads ID data themselves if they consent; anonymized portal addresses remain empty.
Further reading
- Status, corrections, and "Mark as checked in": Check-in in the booking: status, guest data, and marking
- If something gets stuck: Online check-in: troubleshooting
- Registration with authorities: Guest registration: which integration suits you?