Custom fields as placeholders in messages
Use custom fields such as key box code or directions in templates: syntax, multi-line values, one value per language and several rooms.
Updated on October 26, 2026
Custom fields are placeholders you create yourself, for example "Key box code", "Directions" or "Parking". You create a field once, it then shows up for every unit, and you enter the value there. How to create fields and fill them for all units at once is described under Custom placeholders and Wi-Fi details for units.
Using them in the text
You write a custom field with a dot: {{unit.<feldname>}}, for example {{unit.schluesselbox_code}}. The easiest way to insert it is via "Placeholders" in the template editor. The fields are listed there under the category "Custom fields". There is no {{custom_...}} variant, and there are no custom fields per booking, only per unit.
Code for the key box
For a key box or door code, you create the field with the name key_code (the label may be, for example, "Key box code") and enter the code for every unit. Then the ready-made placeholder {{key_code}} fills it in automatically if there is no code on the booking itself. More on this under Placeholders: choosing times, access codes and links correctly.
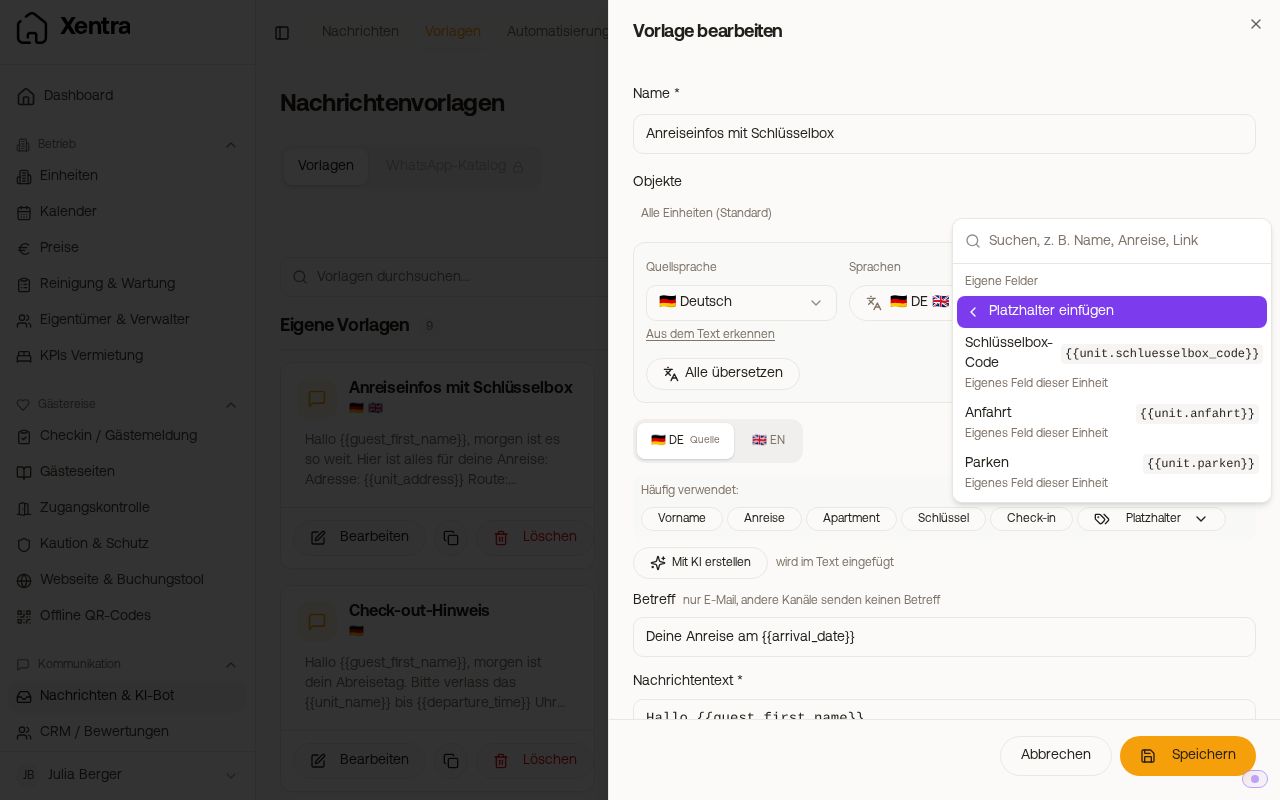 Custom fields in the placeholder menu
If a field is empty for a unit, the spot in the message stays empty. This way you can use one template for all units and fill a note only where it applies.
Don't put placeholders into custom fields
The value of a custom field is inserted as plain text. If it contains another placeholder, such as {{nukicodesxentragenerated}}, that placeholder is not replaced when sent but removed. The guest gets a gap at that spot, for example no PIN. Door codes and other placeholders belong directly in the template.
Multi-line values
A field may have several lines. The input field on the unit grows with it, so a full directions text fits into one field, for example. The line breaks reach the guest as they are.
One value per language
Each custom field can hold one value per language. On the unit, in the section "Custom fields", click the translation icon next to the field and enter the languages or have them translated. When sending, Xentra uses the guest's language and falls back to your base value if nothing exists for that language.
If you change the base text later, Xentra shows "Translations out of date". Until you translate again, all guests get the base text.
Don't translate codes and passwords. Wi-Fi passwords, key box codes and the like can technically be translated too. Then a translated password goes to your guest and the access no longer works. Leave the translations empty for such fields.
Fixed placeholders such as {{guest_first_name}} or {{unit_address}} cannot be translated, they always return the raw value. You translate the sentence around them in the language versions of your template.
Guest page and check-in page
On the guest page and the check-in page, only the value of a field that your texts there also use shows up. If the placeholder sits in a section of the guest page that only appears after check-in, the guest sees the value only then. The safest way to send a code from a custom field is an automation "Immediately after check-in (fully completed)".
Several rooms in one booking
If a guest books several rooms, custom fields show the value of each room, for example "Rm 1: Box 1, Rm 3: Box 3". If the value is the same everywhere, it appears only once. This is controlled in every template by the switch "Show the custom fields of all rooms when there are several rooms" under "Advanced". It is on by default.
Wi-Fi needs no custom field
Wi-Fi name and password are built in as {{wifi_name}} and {{wifi_password}}. Where you enter them is described under Custom placeholders and Wi-Fi details for units.